Contents
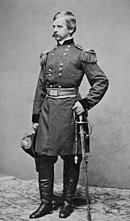
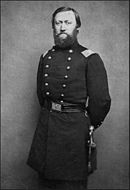
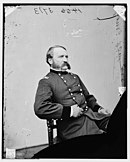
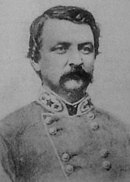
The Battle of Monett's Ferry or Monett's Bluff (April 23, 1864) saw a Confederate States Army force led by Brigadier General Hamilton P. Bee attempt to block a numerically superior Union Army column that was commanded by Brigadier General William H. Emory during the Red River Campaign of the American Civil War. Confederate commander Major General Richard Taylor set a trap for the retreating army of Major General Nathaniel P. Banks near the junction of the Cane River with the Red River. Taylor assigned Bee's troops to plug up the only outlet from the trap while Taylor's other forces closed in from the rear and sides.
Emory responded by sending a brigade to cross the river upstream and turn Bee's right flank. During the battle, Bee ordered a retreat, fearing that his troops were about to be surrounded. This allowed Banks' army to escape the trap and reach temporary safety at Alexandria, Louisiana. Taylor was so disappointed that he relieved Bee from command, despite the fact that Bee's subordinates agreed with his decision to withdraw.[1]
Background
Campaign
The Red River campaign was undertaken because President Abraham Lincoln wanted a Union foothold in Texas to deter the French-supported ruler Maximilian I of Mexico from meddling in the war. The aim was to establish a corridor up the Red River to Texas and Major General Henry Halleck ordered Banks to lead the operation. Major General William B. Franklin led 17,000 Union soldiers up Bayou Teche to Alexandria, to meet Major General Andrew Jackson Smith with 10,000 troops and Rear Admiral David Dixon Porter's fleet of gunboats and river transports. Meanwhile, Major General Frederick Steele with 15,000 men moved south from Little Rock, Arkansas, planning to rendezvous with Banks near Shreveport, Louisiana. Banks was defeated by Taylor's Confederate army at the Battle of Mansfield on 8 April 1864, though his troops repulsed Taylor's attack at the Battle of Pleasant Hill on 9 April.[2]
At this time, Taylor's superior, General Edmund Kirby Smith took away most of Taylor's infantry to fight Steele's column, leaving Taylor with only 5,200 troops. Banks' army waited at Grand Ecore near Natchitoches until 15 April when it was rejoined by Porter's fleet, which was now returning downriver. Banks decided to abandon the campaign because Smith's troops were already overdue to be returned to Major General William T. Sherman and because Steele was unlikely to join them. Banks' army left Grand Ecore on 21 April heading for Alexandria. Porter struggled to get his fleet downriver because of low water.[3]
Forces
Operations

Banks was unaware that most of Taylor's infantry was no longer present. Historian John D. Winter asserted that Banks might have advanced to capture Shreveport. To prepare for the march to Alexandria, all unneeded blankets, overcoats, and gear were burned by the Union soldiers. The march began on the afternoon of 21 April.[4] The Union cavalry led the way, screening the front, right, and rear. It was followed by, in order, the XIX Corps, XIII Corps, and XVII Corps, while the XVI Corps formed the rearguard.[5] Placed in charge of the march, Franklin demanded that a rapid pace be maintained. By 7:00 pm on 22 April, the leading element of the column reached Cloutierville, having marched over 40 mi (64 km). Smith's rearguard troops arrived at 3:00 am on 23 April, having skirmished with Confederate pursuers. They also burned every building along the route.[4] One Union soldier wrote, "At one time, I counted 15 burning houses or mills."[5]
In 1864, the Cane River (also called the Old River) split from the Red River near Grand Ecore and flowed generally southeast. The Cane River ran roughly parallel and west of the Red River before flowing into the Red River again near Colfax. After leaving Grand Ecore, Banks' army crossed the Cane River at Natchitoches into what was essentially an island. The only outlet from the island at the southeastern end was at Monett's Ferry.[6]
Taylor was outnumbered by Banks by 25,000 to 5,000, yet he devised a plan to trap the Union army. Taylor knew that Monett's Ferry made an excellent defensive position. On the south bank at the ferry there were high hills, lakes, and forests. By nightfall on 20 April, Taylor had Bee's cavalry division marching toward Monett's Ferry. Taylor ordered Brigadier General James Patrick Major's cavalry to join Bee, while keeping Brigadier General William Steele's cavalry to pursue the Union army.[7] Brigadier General Camille de Polignac's infantry division moved to block a western exit from the island at Cloutierville while Brigadier General St. John Richardson Liddell's force was positioned near Colfax to block Banks' army from crossing to the east bank of the Red River.[8] After Brigadier General Thomas Green was killed at the Battle of Blair's Landing on 12 April,[9] Bee assumed command of Taylor's cavalry corps because he outranked Major who was more experienced.[10]
Battle
Rearguard skirmish
On the evening of 22 April, when Brigadier General John A. Wharton's Confederate cavalry tried to attack the Federal rearguard near Cloutierville, a minor panic ensued when the cavalrymen believed they were being outflanked. Despite the efforts of Lieutenant Colonel D. C. Giddings[6] of the 21st Texas Cavalry Regiment,[11][note 1] the cavalry retreated. This proved to be fortuitous because the Union rearguard was lying in ambush. The Confederates followed at a distance and were able to put out the fires set in Cloutierville by Smith's infantry.[6]
In the predawn hour of 23 April, Captain John M. T. Barnes'[12] 1st Louisiana Regular Battery[13] briefly shelled the Union rearguard south of Cloutierville. When this provoked the Federal cavalry to deploy, they were charged by Colonel George W. Carter's Confederate cavalry brigade and driven back 1,200 yd (1,097 m). However, Union artillery fire caused the Confederate horsemen to pull back and the Union retrograde movement continued.[14]
Approach march

Brigadier General Cuvier Grover's XIX Corps division, 3,000 soldiers, had been left to garrison Alexandria during the initial Union advance.[15] After the Battle of Pleasant Hill, Banks ordered three of Grover's regiments to join him at Grand Ecore. These troops arrived via riverboat under the command of Brigadier General Henry Warner Birge.[16] The wound Franklin received at Mansfield rendered him unfit for duty, so he handed command over to Emory on the morning of 23 April.[4] Emory began his march at 4:30 am and advanced 3 mi (4.8 km) before his troops ran into Bee's skirmishers, which were driven across the Cane River.[17]
Emory's troops saw that they lost the race to the crossing. They faced the apparently strongly-held bluffs on the south bank while realizing there was a Confederate force behind them as well. One Union soldier recalled, "A general despondency pervaded the whole army." Furthermore, the area right in front of the bluff was cleared of trees and under potential crossfire from Confederate artillery. For his part, Bee was startled by seeing 15,000 Union soldiers in front of his force of 2,000. Nevertheless, Bee was determined to hold his ground. He and the other Confederate leaders believed that Monett's Ferry was the only place where the Cane River could be forded.[18]
Combatants

Bee assigned Colonel Walter P. Lane's brigade, led by Colonel Xavier Debray to hold the left flank, Major's brigade to defend the center, and Colonel Arthur P. Bagby Jr. brigade to watch the right flank. The 36th Texas Cavalry Regiment under Colonel Peter C. Woods supported the center while Debray's 26th Texas Cavalry Regiment supported the right. Bee's artillery included Captain T. D. Nettles' Val Verde Texas Battery, Captains M. V. McMahan's and William G. Moseley's Texas batteries, and Captain John A. A. West's Louisiana Battery.[17] Colonel Alexander W. Terrell's brigade was sent to guard the supply depot at Beasley's Plantation.[19][note 2]
The infantry under Emory's immediate command were his own XIX Corps division, Birge's soldiers, and Brigadier General Robert Alexander Cameron's XIII Corps division. He also had available Brigadier General Richard Arnold's cavalry and Captain Henry W. Closson's artillery. Deciding against a frontal assault,[8] Emory ordered Birge to take his 3rd Brigade, two of Cameron's regiments, and the 13th Connecticut Infantry Regiment to go upstream and look for a ford.[20] Meanwhile, Emory sent Colonel Edmund J. Davis' 4th Cavalry Brigade downstream to look for a viable crossing. Davis' mission ended in failure,[8] but Birge's troops encountered a local Black man who showed them a little-known ford about 2 mi (3.2 km) upstream. To draw attention away from Birge's flanking column, Emory deployed the 1st and 2nd Brigades of his own division opposite the ferry crossing in a show of force.[21]
Action at Monett's

After being guided across the waist-deep ford, Birge's soldiers slogged through a marsh before arriving at dry ground.[22] They waded across a small bayou and marched about 1 mi (1.6 km) before confronting a high hill defended by Confederates.[20] Birge ordered 3rd Brigade commander Colonel Francis Fessenden to capture the position. Finding that its flanks could not be turned, Fessenden called for a frontal assault.[22] From right to left were the 165th New York, 173rd New York, 30th Maine, and 162nd New York Infantry Regiments. They advanced across an open field and up the hill against Confederate opposition.[23]
After Birge's outflanking force was detected, General Major assigned Colonel George W. Baylor to take command of the left flank. Baylor's defense line consisted of Colonel George T. Madison's 3rd Texas Cavalry Regiment (Arizona Brigade), Colonel Peter C. Woods' 36th Texas Cavalry Regiment, Colonel Walter P. Lane's 1st Texas Partisan Rangers,[24] and Lieutenant Colonel Benjamin W. Clark's 1st Louisiana State Guards Cavalry Battalion.[25] The infantry were supported by two recently captured rifled guns from McMahan's Texas Battery under Lieutenant Fontaine.[24] Fessenden was hit in the leg and Lieutenant Colonel J. W. Blanchard assumed command. After taking their opponents under brisk fire, Baylor's men fell back and the Union soldiers occupied the hill.[23]
Pushing forward 0.5 mi (805 m), Blanchard shifted his reserve units, the 13th Connecticut and the 1st Louisiana Infantry Regiments to the right flank.[23] While crossing another open field, Birge, his staff, and some cavalrymen rode forward to reconnoiter a wooded area in front of them. Just as the Union soldiers crossed a deep gully, Baylor's soldiers opened fire. Birge and his party came galloping back, disrupting the infantry formation. Many soldiers started to panic but Colonel William O. Fiske of the 1st Louisiana rallied the men and got them moving forward again. The Union soldiers pressed on and took cover in a ravine. For ten minutes, the Confederates continued firing, but then they suddenly abandoned their position.[26]

Colonel Isham Chisum's 2nd Texas Partisan Rangers and Baylor's 2nd Texas Cavalry Regiment (Arizona Brigade) were shifted to reinforce Baylor's second position. The right flank was anchored on the Cane River, but the left flank did not extend far enough to reach a lake. Some Union troops were seen heading for the open flank, so Baylor ordered Madison's regiment to mount and move to the left to cover the gap. Baylor sent a messenger to Bee asking for two more regiments. Meanwhile, a Union battery on the north side of the Cane River began firing at Fontaine's two guns. At this time, Baylor's messenger returned from Bee stating that Baylor ought to get out of there the best way he could. By this time, most of Bee's command had retreated. Baylor ordered the 2nd Texas (Arizona Brigade) and Fontaine's guns to hold the ferry crossing until the left wing could escape, which was done.[24]
Near the end of the action, Emory sent Closson forward with five guns to suppress Bee's artillery fire. Some Confederates crossed the river in an attempt to capture the guns, but were driven off by the 116th New York Infantry Regiment. Soon after, dismounted troopers of the 2nd New York Veteran Cavalry Regiment[27] and the 116th New York splashed across the Cane River at the ferry and occupied the heights. Worried about Davis' abortive mission downstream and Emory's demonstration in front, as well as Birge's turning movement upstream, Bee had ordered a retreat to Beasley's Plantation. Bee was convinced that both his flanks were enveloped and that Emory was about to overwhelm his position by a frontal assault.[28]
Aftermath

Emory sent three cavalry regiments to pursue Bee's withdrawing troops. In the twilight, the Union horsemen mistakenly chased a small Confederate detachment down the road to Alexandria, rather than follow Bee's main body toward Beasley's on the Fort Jesup road. With the crossing cleared of Confederates, Banks' African-American brigade laid a pontoon bridge across the Cane River, which was ready a little after nightfall. All night long Banks' army crossed the bridge. Wharton's cavalry skirmished with Smith's troops during the morning, but the Confederates pulled back after one hour. The last of Smith's rearguard passed over the bridge at 2:00 pm on 24 April, whereupon the pontoons were taken up. Banks' leading elements arrived at Alexandria on the morning of 25 April. Union losses during the operation numbered 300 men, including 153 from Fessenden's brigade, while Bee only admitted having lost 50 casualties.[29]
Taylor was furious at the escape of Banks' army, which he believed was nearly in a state of panic, and he blamed Bee.[28] In his official report, Taylor listed the errors made by Bee as follows.[30]
Sending Terrell's entire brigade back to Beasley's to look after a subsistence train, for the safety of which I had amply provided; second, in taking no steps to increase artificially the strength of his position; third, in massing his troops in the center, naturally the strongest part of his position and where the enemy were certain not to make any decided effort, instead of toward the lakes on which his two flanks rested; fourth, in this, that when he was forced back he retired his whole force 30 mi (48 km) to Beasley's, instead of attacking vigorously the enemy's column while marching 13 mi (21 km) to Cotile through a dense pine woods, encumbered with trains and artillery and utterly demoralized by the vigorous attacks of Wharton in the rear. He displayed great personal gallantry, but no generalship.[30]

In his defense, Bee pointed out that the low-water condition of the Cane River permitted the Union army to outflank his defenses and the immense size of Banks' army meant that "success was impossible". Bagby, Major, and Wharton defended Bee's actions, but Taylor ignored their pleas. He removed Bee from command of his cavalry.[31]

Historian William Riley Brooksher asserted that much of Taylor's criticism of Bee was justified. However, he believed Bee's worst blunder was being fooled into believing that Davis' move against his right flank and Emory's demonstration against his center were major threats. Brooksher insisted that even if Bee had retained Terrell's brigade, fortified his position, and had not been taken in by Emory's feint attacks, Bee could not have stopped Banks' army. It was just too large for Bee to handle.[31]
Foiled of his prey at Monett's Ferry, Taylor still planned to trap Banks' army on the Red River. To isolate Banks at Alexandria, Taylor placed Steele with 1,000 men north and west of the city, Bagby with 1,000 soldiers on the south side, Polignac with 1,200 infantry supporting Steele and Bagby, Major with 1,000 troops at David's Ferry on the Red River below Alexandria, and Liddell with 700 on the east side of the river.[32] Porter's fleet was trapped by low water above the falls at Alexandria, and Banks' army had to stay there until the fleet could be either saved or destroyed.[33]
Notes/References
Footnotes
- ^ Brooksher stated that Giddings led the 25th Texas, but according to Oates, he led the 21st Texas Cavalry in Carter's brigade.
- ^ The accounts of Brooksher and Winters differ somewhat. The Confederate order of battle shows 4 brigades led by Debray, Terrell, Lane (Baylor), and Bagby. There is no Major's brigade. Lane/Baylor's brigade was on the left, Bagby's brigade was on the right, Terrell's brigade was at Beasley's, and Debray's brigade (23rd, 26th, and 36th Texas) was split up. It is not clear which units Major commanded.
Citations
- ^ "Monett's Ferry (Cane River Crossing)." Columbus, Ohio: Department of History, The Ohio State University, retrieved online November 2, 2023.
- ^ Boatner (1959), pp. 685–687.
- ^ Boatner (1959), p. 687.
- ^ a b c Winters (1987), p. 362.
- ^ a b Brooksher (1998), p. 173.
- ^ a b c Brooksher (1998), p. 174.
- ^ Brooksher (1998), pp. 170–171.
- ^ a b c Brooksher (1998), p. 177.
- ^ Brooksher (1998), p. 157.
- ^ Brooksher (1998), p. 169.
- ^ Oates (1994), p. 124, 176.
- ^ Brooksher (1998), p. 175.
- ^ Bergeron (1989), p. 18.
- ^ Brooksher (1998), pp. 177–178.
- ^ Winters (1987), p. 334.
- ^ Brooksher (1998), p. 164.
- ^ a b Brooksher (1998), p. 176.
- ^ Brooksher (1998), pp. 176–177.
- ^ Brooksher (1998), p. 176; Winters (1987), p. 363.
- ^ a b Winters (1987), p. 363.
- ^ Brooksher (1998), p. 178.
- ^ a b Brooksher (1998), p. 179.
- ^ a b c Winters (1987), pp. 363–364.
- ^ a b c U.S. War Dept., Official Records, Vol. 34/1, pp. 619–620 – Report of Col. George W. Baylor, Second Arizona Cavalry, commanding Major's cavalry brigade, of operations April 7-18, April 18, 1864, pp.616-625
- ^ Bergeron (1989), pp. 55–56.
- ^ Brooksher (1998), pp. 180–181.
- ^ Winters (1987), p. 364.
- ^ a b Brooksher (1998), p. 181.
- ^ Winters (1987), pp. 364–365.
- ^ a b U.S. War Dept., Official Records, Vol. 34/1, pp. 580–581 – Report of Maj. Gen R. Taylor, C.S. Army, April 24, 1864, pp. 580-581
- ^ a b Brooksher (1998), p. 182.
- ^ Brooksher (1998), pp. 184–185.
- ^ Winters (1987), p. 367.
References
- Bergeron, Arthur W. Jr. (1989). Guide to Louisiana Confederate Military Units 1861-1865. Baton Rouge, La.: Louisiana State University Press. ISBN 0-8071-2102-9.
- Boatner, Mark M. III (1959). The Civil War Dictionary. New York, N.Y.: David McKay Company Inc. ISBN 0-679-50013-8.
- Brooksher, William Riley (1998). War Along the Bayous: The 1864 Red River Campaign in Louisiana. Washington, D.C.: Brassey's. ISBN 1-57488-139-6.
- Oates, Stephen B. (1994) [1961]. Confederate Cavalry West of the River. Austin, Tex.: University of Texas Press. ISBN 0-292-71152-2.
- U.S. War Department (1891). Operations in Louisiana and the Trans-Mississippi States and Territories. January 1-June 30, 1864. The War of the Rebellion: A Compilation of the Official Records of the Union and Confederate Armies. Vol. XXXIV-XLVI-I. Washington, DC: U.S. Government Printing Office. pp. 580–581, 619–620. hdl:2027/coo.31924077700288. OCLC 427057.
 This article incorporates text from this source, which is in the public domain.
 - Winters, John D. (1987) [1963]. The Civil War in Louisiana. Baton Rouge: Louisiana State University Press. ISBN 0-8071-0834-0.
Further reading
- CWSAC (2010). "Update to the Civil War Sites Advisory Commission: Report on the Nation's Civil War Battlefields: State of Louisiana" (PDF). U.S. Dept. of the Interior. Retrieved January 27, 2023.
- Snyder, Laurie. "Research Update: More New Details Regarding the Lives of Formerly Enslaved Black Men Who Enlisted with the 47th Pennsylvania Volunteer Infantry". 47th Pennsylvania Volunteers. Retrieved January 26, 2023.

